
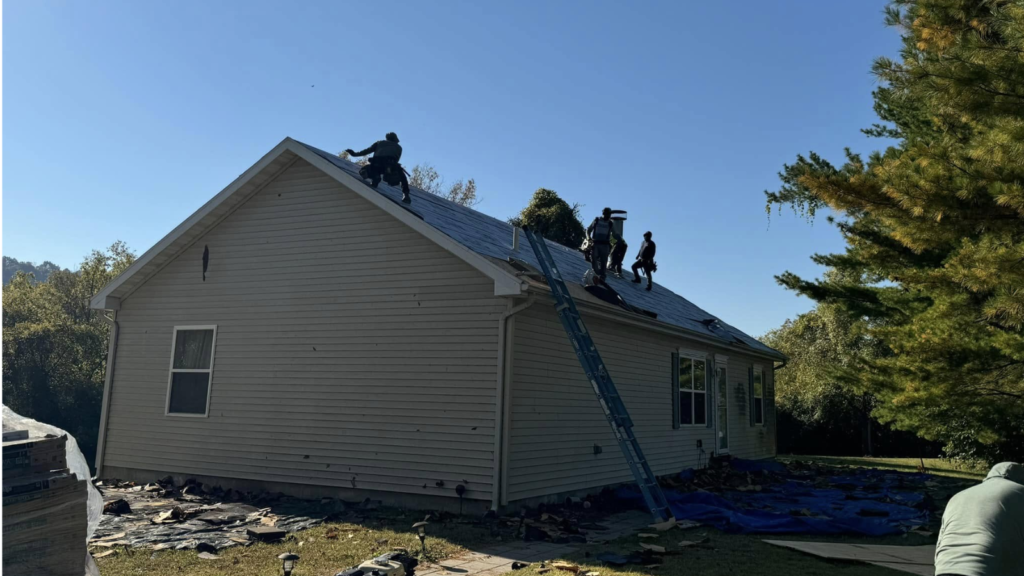
Severe storms can leave homeowners facing unexpected damage, urgent repairs, and difficult decisions. Strong winds, hail, heavy rainfall, and falling branches can affect roofing systems, gutters, siding, and other exterior components.
When a storm damages your home, understanding what happens next can make the restoration process easier to manage.
You may need an emergency roof covering, a professional damage inspection, an insurance claim, contractor estimates, material selections, and a repair schedule. Each step requires coordination, and the overall process can vary depending on the extent of damage.
Understanding the storm restoration timeline helps homeowners prepare for each stage, organize important documentation, and avoid unnecessary delays.
At Diamond Roofing & Exteriors, we serve homeowners throughout Columbia, Waterloo, Alton, Bethalto, Godfrey, Chesterfield, Crystal City, Farmington, Festus, Herculaneum, Hillsboro, Mehlville, Oakville, Pevely, St. Charles, and St. Peters.
Whether your property has experienced hail damage, missing shingles, damaged gutters, or more extensive storm related problems, knowing what to expect can help you make informed decisions.
Why Understanding the Storm Restoration Timeline Matters
Storm restoration involves more than replacing damaged shingles.
A complete project may include several interconnected activities:
- Assessing immediate safety concerns
- Preventing additional water intrusion
- Documenting property damage
- Arranging professional inspections
- Communicating with an insurance provider
- Reviewing repair estimates
- Selecting materials
- Scheduling restoration work
- Completing repairs
- Performing final quality checks
These steps may overlap, and not every project requires all of them.
A minor roofing repair may be completed relatively quickly.
A project involving structural damage, multiple exterior systems, or insurance questions may take considerably longer.
Understanding the storm restoration timeline helps homeowners set realistic expectations without assuming that every property follows the same schedule.
What Determines How Long Storm Restoration Takes?
There is no universal completion time for storm damage restoration.
The duration depends on several factors.
Extent of Damage
A few missing shingles may require limited repairs.
Widespread roof damage, damaged decking, or structural concerns may involve more extensive work.
Weather Conditions
Rain, wind, snow, and other severe conditions may affect inspection and installation schedules.
Insurance Review
If an insurance claim is involved, the insurer’s review process may influence when homeowners can finalize project decisions.
Material Availability
Certain roofing materials, siding products, or specialty components may require additional ordering time.
Contractor Scheduling
Following widespread storms, demand for inspections and repairs may increase.
Additional Damage
Removing damaged roofing materials may reveal underlying problems that were not visible during the initial inspection.
Each of these factors can affect the storm restoration timeline.
Stage 1: Prioritize Safety Immediately After the Storm
The first step is protecting people.
Before inspecting your property, watch for:
- Downed electrical lines
- Fallen trees
- Unstable branches
- Damaged structures
- Broken glass
- Flooded areas near electrical equipment
- Loose roofing materials
Avoid climbing onto the roof.
Storm damaged roofing systems may contain unstable surfaces or hidden structural concerns.
If you suspect serious structural damage, keep people away from the affected area until qualified professionals determine that it is safe.
What Homeowners Should Do First
Once conditions are safe:
- Check for visible damage from the ground.
- Look for active water intrusion.
- Photograph accessible damage.
- Record the storm date.
- Identify urgent protection needs.
- Contact appropriate emergency services or professionals when necessary.
These initial actions create a foundation for the restoration process.
Stage 2: Arrange Emergency Protection if Necessary
Some storm damage requires immediate attention before permanent repairs can begin.
Examples include:
- Missing roof sections
- Openings caused by falling branches
- Active leaks
- Damaged skylights
- Exposed decking
- Broken exterior components
Temporary protection may help reduce additional water intrusion.
Depending on the circumstances, professionals may install protective coverings or perform limited emergency repairs.
Temporary measures should not be treated as permanent roofing solutions.
Why Emergency Protection Matters
Water entering through damaged roofing materials can affect:
- Insulation
- Roof decking
- Ceilings
- Drywall
- Electrical components
- Interior finishes
Reducing continued moisture exposure can help limit additional damage.
Homeowners should keep records of emergency work and related expenses.
Insurance policies may contain specific requirements concerning reasonable steps to prevent further damage.
Stage 3: Document the Storm Damage
Documentation is an important part of the storm restoration timeline, especially when insurance may be involved.
Photographs and written notes can help establish the condition of the property after the event.
What Should You Document?
Consider recording:
- Missing shingles
- Damaged flashing
- Dented gutters
- Damaged siding
- Fallen branches
- Broken exterior fixtures
- Interior water stains
- Emergency protection work
- Visible debris
Take photographs only when it is safe.
Do not delay urgent safety measures or emergency protection solely to collect documentation.
Keep a Restoration File
Create a folder containing:
- Storm date
- Photographs
- Contractor inspection reports
- Repair estimates
- Insurance correspondence
- Material selections
- Receipts
- Work agreements
- Final invoices
Organized records can make communication easier throughout the project.
Stage 4: Schedule a Professional Roof and Exterior Inspection
After immediate hazards are addressed, a professional inspection can help determine the extent of damage.
Storms may affect several exterior components at once.
A roofing contractor may evaluate:
- Asphalt shingles
- Metal roofing
- Ridge caps
- Flashing
- Roof valleys
- Roof vents
- Gutters
- Downspouts
- Siding
- Visible decking concerns
The inspector may also review accessible interior areas for signs of moisture intrusion.
Why Professional Inspection Matters
Not every storm causes functional roof damage.
Some impact marks may be cosmetic.
Other damage may be difficult to identify from the ground.
A professional inspection helps distinguish actual roofing concerns from normal wear or unrelated conditions.
This information supports decisions about repair, replacement, and insurance communication.
Stage 5: Determine Whether Repair or Replacement Is Appropriate
After inspection, the contractor should explain the findings.
Localized damage may be repairable.
For example, a small number of missing shingles or a damaged pipe boot may require targeted work.
More extensive damage may justify replacement.
Factors include:
- Damage extent
- Roof age
- Existing deterioration
- Decking condition
- Material compatibility
- Repair history
The storm restoration timeline may be shorter for a limited repair than for a full roof replacement, although scheduling and weather can still affect both.
Avoid Assuming Every Storm Requires Replacement
Hail or wind exposure alone does not automatically justify a new roof.
A recommendation should be based on the actual condition of the roofing system.
Homeowners should request clear explanations and photographs of identified damage.
Stage 6: Review Your Homeowners Insurance Policy
If you believe the storm caused covered damage, review your insurance policy.
Coverage depends on the terms of the policy and the circumstances of the loss.
Important considerations may include:
- Covered causes of loss
- Deductibles
- Exclusions
- Claim notification requirements
- Repair or replacement provisions
- Documentation requirements
Some policies contain special wind or hail deductibles.
Homeowners should confirm their specific terms rather than assuming that every policy operates the same way.
What If You Do Not Have Insurance Coverage?
Restoration can still proceed without an insurance claim.
The homeowner can obtain professional estimates and arrange repairs directly.
Financing or payment options may be worth discussing with the contractor when available.
However, do not assume that a particular financing program is offered without confirming its terms.
Stage 7: Notify Your Insurance Provider
If you decide to file a claim, contact your insurance provider using the appropriate reporting process.
The insurer may request:
- Date of loss
- Description of damage
- Photographs
- Contact information
- Details about emergency repairs
- Contractor estimates
The insurer may also arrange an adjuster inspection.
The exact process depends on the company and policy.
Does Filing a Claim Guarantee Approval?
No.
Filing a claim begins the insurer’s review process.
Coverage and payment decisions depend on the policy, evidence, and insurer determination.
A roofing contractor can document damage and provide repair estimates, but the contractor does not decide whether a claim is covered.
Stage 8: The Insurance Adjuster Inspection
An insurance adjuster may evaluate the reported damage.
The adjuster may review:
- Roof condition
- Exterior impacts
- Interior moisture
- Damage documentation
- Repair scope
- Policy considerations
The insurer uses this information as part of its claim evaluation.
Can Your Roofing Contractor Provide Information?
Yes.
A roofing contractor can provide inspection photographs, measurements, estimates, and explanations of observed conditions.
However, insurance coverage decisions remain with the insurer.
Homeowners should keep communication organized and review documents carefully.
Stage 9: Review the Insurance Estimate
If the insurer provides an estimate, review it alongside the contractor’s proposed scope of work.
The documents may describe:
- Roofing materials
- Removal and disposal
- Flashing
- Underlayment
- Gutters
- Siding
- Labor
- Other repair items
Differences do not automatically mean either estimate is incorrect.
They may reflect different assumptions, measurements, or identified work.
Ask questions about items that are unclear.
What If the Estimates Differ?
Homeowners can request clarification from the insurer and contractor.
Additional photographs or documentation may help explain differences.
If necessary, follow the insurer’s procedures for submitting further information.
Stage 10: Understand Deductibles and Payments
Insurance payments vary depending on policy terms.
Some policies may account for depreciation or include replacement cost provisions.
Homeowners should review the insurer’s explanation of payments and any requirements for recovering additional amounts.
The deductible is generally the homeowner’s responsibility under the policy.
Be cautious of anyone promising to eliminate or improperly waive an insurance deductible.
Keep Financial Records
Maintain copies of:
- Insurance estimates
- Payment explanations
- Contractor invoices
- Receipts
- Change orders
- Final payment records
These documents help you track the financial side of the storm restoration timeline.
Stage 11: Choose a Roofing Contractor
Selecting a contractor is one of the most important decisions in the restoration process.
Look for:
- Relevant roofing experience
- Appropriate insurance
- Clear written estimates
- Knowledge of roofing materials
- Professional communication
- Defined workmanship terms
- Local service availability
A contractor should explain the proposed work and answer questions without pressuring you into an immediate agreement.
Be Cautious After Widespread Storms
Severe storms can attract aggressive sales activity.
Avoid contractors who:
- Guarantee insurance approval
- Pressure you to sign immediately
- Provide vague estimates
- Refuse to explain damage
- Make unrealistic promises
- Avoid written agreements
Choose a contractor based on qualifications, communication, and the proposed scope of work.
Stage 12: Review the Restoration Contract
Before signing, review the agreement carefully.
A written contract should clearly identify the proposed work.
Important details may include:
- Roofing materials
- Scope of repairs
- Project price
- Payment terms
- Estimated schedule
- Warranty information
- Cleanup responsibilities
- Procedures for additional work
Ask questions about anything you do not understand.
Do not rely solely on verbal promises.
Stage 13: Select Roofing and Exterior Materials
Storm restoration may provide an opportunity to replace damaged materials with appropriate products.
Homeowners may need to choose:
- Asphalt shingles
- Metal roofing
- Underlayment
- Flashing components
- Gutters
- Siding
- Exterior colors
Material selection should consider roof design, budget, appearance, and installation requirements.
Matching Existing Materials
When only part of the roof or siding is damaged, matching existing materials can be challenging.
Older products may have weathered or may no longer be available.
Color differences can occur even with similar products.
Discuss material compatibility and appearance expectations before approving repairs.
Stage 14: Order Materials and Confirm Scheduling
Once the scope of work is established, materials may need to be ordered.
Availability varies depending on product type, color, manufacturer, and supplier inventory.
Common products may be readily available.
Specialty materials may require additional lead time.
Contractor scheduling also depends on weather and existing projects.
This stage can influence the overall storm restoration timeline, especially after widespread storm events.
Stage 15: Prepare Your Home for Restoration
Before work begins, homeowners should prepare the property.
Recommended steps include:
- Move vehicles away from construction areas.
- Secure outdoor furniture.
- Protect delicate landscaping where practical.
- Keep children and pets away from the work zone.
- Discuss driveway and equipment access.
- Remove fragile items from walls if vibration is a concern.
- Confirm the project schedule.
- Establish a communication contact.
Preparation helps reduce disruptions and supports jobsite safety.
Stage 16: Begin Roof Repair or Replacement
The restoration process depends on the type of damage.
A limited repair may involve replacing damaged shingles, flashing, or vents.
A complete roof replacement generally involves more extensive work.
Typical Roof Replacement Activities
A project may include:
- Preparing the work area
- Removing existing roofing materials
- Inspecting exposed decking
- Replacing damaged decking
- Installing underlayment
- Installing flashing
- Installing new roofing materials
- Completing roof penetrations
- Cleaning the site
- Performing final checks
The exact sequence depends on the roofing system and project requirements.
Stage 17: Address Hidden Damage
Some roofing problems become visible only after damaged materials are removed.
Examples include:
- Deteriorated decking
- Moisture damage
- Previous installation problems
- Damaged flashing
- Hidden structural concerns
If additional damage is discovered, the contractor should explain the findings and proposed corrective work.
Changes to the scope may affect cost and scheduling.
What Happens if Insurance Is Involved?
Additional documented damage may require further communication with the insurer.
The insurer determines whether additional work is covered under the policy.
Homeowners should review any changes before authorizing work.
Stage 18: Repair Gutters, Siding, and Other Exterior Components
Storms may damage multiple exterior systems.
A complete restoration project may involve:
- Gutter replacement
- Downspout repair
- Siding replacement
- Fascia repairs
- Soffit repairs
- Flashing corrections
Coordinating these activities can help ensure that the exterior components work together properly.
Why Gutters Matter
Gutters direct roof runoff toward downspouts.
Damaged gutters may overflow or drain improperly.
Restoring the roof without addressing damaged gutters can leave moisture management problems unresolved.
Stage 19: Final Inspection and Quality Review
After work is completed, the contractor should review the finished project.
Final checks may include:
- Roofing material installation
- Flashing details
- Roof penetrations
- Visible fastening concerns
- Gutter connections
- Cleanup
- Remaining debris
Homeowners should also have an opportunity to ask questions.
What Should You Ask During the Final Walkthrough?
Consider asking:
- Was all approved work completed?
- Were any unexpected issues discovered?
- Were damaged decking areas addressed?
- Were gutters and flashing checked?
- What maintenance is recommended?
- What warranty terms apply?
- Are there any remaining concerns?
A final review helps clarify the completed scope of work.
Stage 20: Complete Documentation and Final Payments
The final stage of the storm restoration timeline involves organizing project records and completing applicable payments.
Keep copies of:
- Final invoices
- Payment receipts
- Material information
- Warranty documents
- Inspection photographs
- Approved change orders
- Insurance correspondence
If the policy provides additional payment after completed repairs, follow the insurer’s stated documentation process.
How Long Does the Entire Storm Restoration Process Take?
The total duration varies considerably.
A minor repair that does not involve insurance may be completed relatively quickly once a contractor is available.
A larger project may require additional time for inspections, estimates, claim review, materials, scheduling, and installation.
Structural damage or complex exterior restoration can extend the process further.
Homeowners should avoid relying on promises that every project will be completed within a fixed number of days.
A project specific schedule is more useful.
Storm Restoration Timeline at a Glance
| Stage | Main Activity | What Can Affect Timing |
| 1 | Safety assessment | Severity of damage and site hazards |
| 2 | Emergency protection | Access, weather, and urgency |
| 3 | Damage documentation | Property accessibility |
| 4 | Professional inspection | Contractor availability |
| 5 | Repair scope evaluation | Damage extent and hidden concerns |
| 6 | Insurance notification | Policy and claim procedures |
| 7 | Adjuster review | Insurer scheduling and documentation |
| 8 | Estimate review | Scope differences and clarification |
| 9 | Contractor selection | Availability and project complexity |
| 10 | Material ordering | Product selection and inventory |
| 11 | Restoration work | Weather, labor, and additional repairs |
| 12 | Final inspection | Completion of approved work |
| 13 | Documentation and payment | Contract and insurance requirements |
This overview illustrates the sequence, but some activities may occur at the same time.
Common Reasons Storm Restoration Gets Delayed
Delays may result from:
- Continued severe weather
- Material shortages
- Contractor scheduling demand
- Additional damage discoveries
- Insurance documentation questions
- Changes to the project scope
- Structural repair requirements
Understanding these possibilities helps homeowners prepare for a realistic storm restoration timeline.
How to Avoid Unnecessary Delays
Homeowners can help keep the process organized by:
- Documenting damage promptly
- Responding to requests for information
- Reviewing estimates carefully
- Selecting materials in a timely manner
- Keeping communication records
- Confirming project details in writing
- Addressing questions before work begins
Not every delay can be prevented.
However, organized communication can reduce avoidable confusion.
Should You Wait for Insurance Before Making Repairs?
Emergency protection may be necessary before the insurer completes its review.
Homeowners should follow applicable policy requirements and take reasonable steps to prevent additional damage.
Permanent work may involve additional planning, depending on the situation.
Discuss timing with your insurer and contractor so that documentation and repair decisions are coordinated appropriately.
Do not delay urgent safety measures solely because an insurance review is pending.
What If Your Insurance Claim Is Denied?
A denied claim does not necessarily mean the roof is undamaged.
It means the insurer has determined that the claim is not payable under its assessment and applicable policy terms.
Homeowners should review the written explanation.
If they disagree, they may follow the insurer’s review or appeal procedures and consider obtaining qualified advice where appropriate.
Necessary repairs may still need to be completed regardless of insurance coverage.
What If the Storm Damage Is Minor?
Not every storm requires a major restoration project.
A few missing shingles or a localized flashing problem may be repairable.
The appropriate solution depends on the roofing system’s condition.
A professional inspection can help determine whether targeted repairs are sufficient.
What If Your Roof Is Already Old?
An older roof may have existing deterioration unrelated to the storm.
A contractor should distinguish visible storm related damage from normal aging when possible.
Insurance coverage for aging or maintenance related conditions depends on policy terms.
Homeowners may need to consider both immediate storm repairs and the roof’s remaining service life.
Why Local Roofing Experience Matters
Homes throughout Columbia and surrounding Illinois and Missouri communities experience thunderstorms, hail, wind, and seasonal temperature changes.
A local contractor familiar with these conditions can help homeowners evaluate roofing and exterior damage.
Local experience may also support communication about material choices, installation practices, and scheduling considerations.
Serving Columbia and Surrounding Communities
Diamond Roofing & Exteriors serves homeowners throughout Columbia, Waterloo, Alton, Bethalto, Godfrey, Chesterfield, Crystal City, Farmington, Festus, Herculaneum, Hillsboro, Mehlville, Oakville, Pevely, St. Charles, and St. Peters.
Whether your home experienced hail in Columbia, wind damage in Waterloo, damaged gutters in Festus, or falling branches in St. Charles, the restoration process should begin with a clear understanding of the property’s condition.
A well organized storm restoration timeline helps homeowners move from uncertainty toward a practical repair plan.
Why Choose Diamond Roofing & Exteriors?
At Diamond Roofing & Exteriors, we understand that storm damage can create stressful decisions for homeowners.
You may need to understand the extent of damage, compare repair options, communicate with an insurer, and plan restoration work.
Our services include:
- Roof inspections
- Roof repair
- Roof replacement
- Storm damage restoration
- Metal roofing
- Vinyl siding
- Gutters
- Exterior solutions
We help homeowners evaluate roofing and exterior concerns and understand appropriate repair or replacement options.
When planning storm restoration, our goal is to consider the overall condition of the property and the work required to restore damaged components.
Clear communication and realistic expectations are important throughout the process.
Final Thoughts
Recovering from storm damage involves several important steps.
The process begins with safety and emergency protection.
It continues through damage documentation, professional inspection, insurance communication when applicable, contractor selection, material planning, and restoration work.
The final stages involve quality checks, project records, and applicable payments.
Understanding the storm restoration timeline helps homeowners prepare for each stage without assuming that every project follows the same schedule.
Some repairs may be straightforward.
Others may involve extensive roofing damage, structural concerns, multiple exterior components, or insurance questions.
The most important priorities are protecting the home, understanding the damage, and choosing appropriate corrective work.
Homeowners should avoid rushing into agreements without reviewing the scope.
They should also avoid postponing necessary emergency protection when the property is exposed to additional water intrusion.
A professional inspection can help determine whether localized repairs or more extensive restoration is appropriate.
For homeowners throughout Columbia, Waterloo, Alton, Bethalto, Godfrey, Chesterfield, Crystal City, Farmington, Festus, Herculaneum, Hillsboro, Mehlville, Oakville, Pevely, St. Charles, and St. Peters, organized planning can make the restoration process easier to manage.
If your property has experienced hail, strong winds, falling branches, or other storm related damage, contact Diamond Roofing & Exteriors to discuss a professional evaluation.
Our team can help you understand your property’s condition, review repair or replacement options, and plan the next steps in your storm restoration timeline.
