
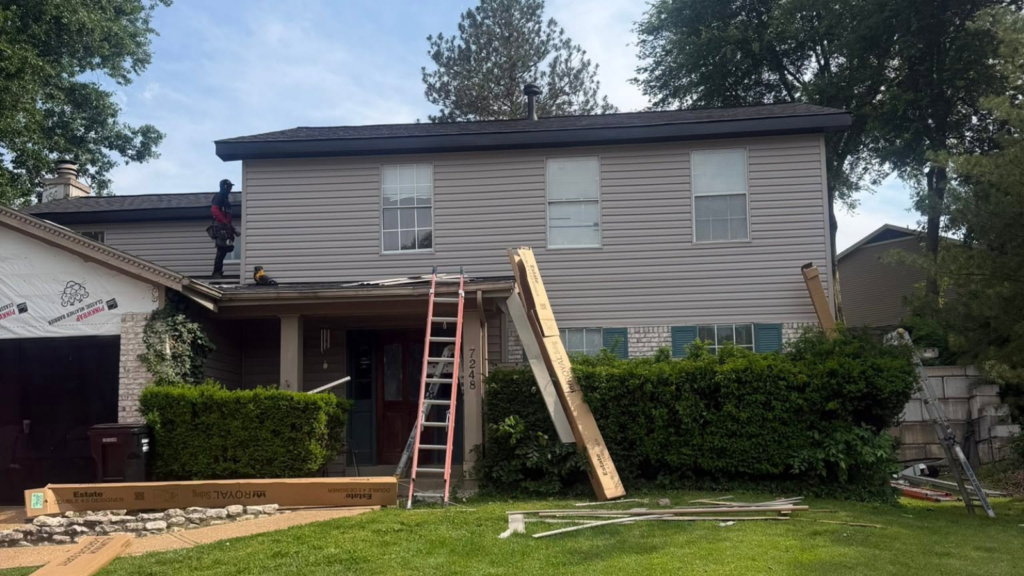
When severe weather moves through Illinois or Missouri, most homeowners immediately think about their roofs. Missing shingles, fallen branches, and visible leaks are obvious reasons to inspect a property after a storm. However, the roof is only one part of the exterior system protecting your home.
Gutters, soffit, and fascia are also vulnerable to wind, hail, heavy rain, and falling debris. Damage to these components can interfere with drainage, expose roof edges to moisture, affect attic ventilation, and eventually contribute to problems in other areas of the home.
That is why a complete storm damage exterior checklist should extend beyond the shingles.
At Diamond Roofing & Exteriors, we serve homeowners throughout Columbia, Waterloo, Alton, Bethalto, Godfrey, Chesterfield, Crystal City, Farmington, Festus, Herculaneum, Hillsboro, Mehlville, Oakville, Pevely, St. Charles, and St. Peters.
Why Gutters, Soffit, and Fascia Matter
Gutters, soffit, and fascia may look like finishing details around the roof, but each component has an important job.
Gutters collect runoff from the roof and direct it toward downspouts.
Fascia forms part of the roof edge and commonly provides a surface for gutter attachment.
Soffit covers the underside of roof overhangs and may contain ventilation openings that help support attic airflow.
Together, these components help protect:
- Roof edges
- Attic areas
- Siding
- Foundations
- Landscaping
- Exterior walls
Storm damage to one component can therefore affect several other areas.
A comprehensive storm damage exterior checklist should evaluate the entire system rather than looking at each component independently.
Safety Comes First After a Storm
Before inspecting your property, make sure conditions are safe.
Stay away from:
- Downed power lines
- Hanging tree limbs
- Broken electrical equipment
- Unstable structures
- Standing water near electrical sources
Do not climb onto the roof after a storm.
Roof surfaces may be wet, damaged, slippery, or structurally compromised.
Many useful observations can be made safely from the ground.
If closer inspection is necessary, contact qualified professionals.
Step 1: Walk Around the Entire Property
Begin your storm damage exterior checklist with a slow walk around the home.
Look at the property from several angles.
You may notice problems from one side that are not visible from another.
Watch for:
- Roofing debris
- Fallen branches
- Loose gutters
- Dented downspouts
- Hanging soffit
- Damaged fascia
- Siding pieces
- Broken exterior fixtures
Take photographs of anything unusual.
Even seemingly minor changes may help a contractor understand what happened during the storm.
Step 2: Check the Ground for Roofing Materials
Before looking at the roof itself, inspect the yard.
Look for:
- Shingles
- Shingle fragments
- Metal flashing
- Gutter components
- Fasteners
- Pieces of siding
Finding roofing materials on the ground is a strong reason to have the roof evaluated.
Do not assume that a piece came from another property without checking your own home.
Step 3: Inspect Gutters From the Ground
Gutters can experience significant storm exposure.
Wind may loosen sections or pull them away from the fascia.
Hail can dent metal gutters.
Falling branches can bend or crush sections.
Heavy rainfall may expose existing drainage weaknesses.
From the ground, look for:
- Sagging sections
- Visible dents
- Gaps between gutters and fascia
- Loose corners
- Bent sections
- Missing components
- Overflow marks
If the gutter line looks noticeably different after the storm, professional inspection may be appropriate.
Step 4: Look for Gutter Separation
A gutter should remain securely attached along the roof edge.
Storm forces or falling debris can loosen hangers and fasteners.
Signs of separation include:
- Visible gaps
- Sections hanging lower than others
- Loose fasteners
- Gutters leaning outward
Once gutters begin pulling away, their slope may change.
That can interfere with proper drainage and place additional stress on the system.
Gutter separation should therefore be included in every storm damage exterior checklist.
Step 5: Check for Dents From Hail
Hail can leave visible marks on gutters and downspouts.
Metal components can sometimes provide useful clues about the severity and direction of a hailstorm.
Look for dents on:
- Gutters
- Downspouts
- Metal roof vents
- Flashing
- Other exterior metal surfaces
Dents do not automatically prove that the roof requires replacement.
However, widespread impact marks may justify a professional roofing inspection.
Roof damage can be more difficult to identify from the ground than damage to exposed metal.
Step 6: Inspect Gutter Corners and Seams
Storm movement can affect gutter joints and corners.
After heavy weather, check for visible separation or distortion.
During the next rainfall, observe whether water leaks from seams.
A small seam leak can allow water to reach fascia, siding, or landscaping repeatedly.
Repairing gutter problems promptly can help protect nearby exterior materials.
Step 7: Inspect Downspouts
Downspouts are an essential part of the drainage system.
A functioning gutter is not very useful if water cannot travel through the downspout.
Check for:
- Dents
- Crushed sections
- Loose connections
- Missing sections
- Separation from the wall
- Clogs
- Damaged extensions
Water should have a clear path from the roof to an appropriate discharge area.
Step 8: Check Downspout Discharge Areas
Follow each downspout to ground level.
Look at where the water is being directed.
Storms can move extensions or wash away soil.
Water discharging too close to the foundation may contribute to drainage problems around the home.
Make sure extensions have not become disconnected or redirected toward vulnerable areas.
Step 9: Look for Clogged Gutters
Storms can fill gutters with:
- Leaves
- Twigs
- Shingle granules
- Small branches
- Other debris
Clogged gutters can overflow during the next rainfall.
Overflow may expose fascia, soffit, siding, landscaping, and foundation areas to unnecessary water.
Clearing drainage obstructions is an important part of the storm damage exterior checklist, but homeowners should avoid unsafe ladder or roof work.
Step 10: Check for Excessive Shingle Granules
After hail or severe weather, homeowners may notice roofing granules in gutters or near downspout outlets.
Some granule loss occurs naturally as asphalt shingles age.
However, an unusual amount following a storm may deserve professional evaluation.
A roofer can determine whether the shingles show impact damage, normal aging, or another condition.
Granules alone should not be used to diagnose storm damage.
Step 11: Inspect the Fascia
Fascia runs along the roof edge and is closely connected to the gutter system.
Storm damage may involve:
- Impact from branches
- Gutter movement
- Water exposure
- Wind
- Existing deterioration becoming worse
Look for:
- Cracks
- Missing sections
- Peeling paint
- Discoloration
- Visible rot
- Loose gutters
- Bent fascia covering
Damaged fascia should not be ignored because it helps form and protect the roof perimeter.
Step 12: Look for Water Behind the Gutters
Water should enter the gutter from the roof surface.
If you see water staining or moisture behind the gutter, there may be a problem involving:
- Gutter attachment
- Gutter slope
- Roof edge details
- Fascia
- Drip edge
Repeated moisture behind gutters can contribute to fascia deterioration.
A contractor can evaluate how the roof edge and gutter system interact.
Step 13: Check for Soft or Deteriorated Fascia
Some fascia damage may have existed before the storm.
However, severe weather can expose or accelerate an existing weakness.
Wood fascia affected by prolonged moisture may become soft or deteriorated.
Attaching a damaged gutter back onto compromised fascia may not provide a durable repair.
The supporting material should be evaluated before gutter restoration is completed.
Step 14: Inspect the Soffit
Soffit is located beneath roof overhangs.
Depending on the home, it may be made from vinyl, aluminum, wood, or another material.
Storm related soffit damage can include:
- Loose panels
- Missing sections
- Cracks
- Dents
- Water staining
- Displacement
Walk around the home and look upward from a safe position.
Include each roof overhang in your storm damage exterior checklist.
Step 15: Look for Missing Soffit Panels
Strong winds can loosen or remove soffit panels.
A missing panel creates an opening into areas beneath the roof overhang.
This may allow:
- Wind driven rain
- Debris
- Insects
- Small animals
to enter spaces that are normally protected.
Missing soffit should therefore be addressed promptly.
Step 16: Check Soffit Ventilation Openings
Some soffit systems include ventilation openings that allow air to enter the attic.
If storm damage bends, blocks, or displaces these components, ventilation may be affected.
Look for:
- Crushed vent areas
- Loose panels
- Debris blocking openings
- Missing vented sections
Ventilation should be evaluated as a complete system rather than simply adding or removing vents without understanding the roof design.
Step 17: Inspect Roof Edges
The roof perimeter can experience strong wind forces.
From the ground, look for:
- Lifted shingles
- Missing shingles
- Damaged drip edge
- Uneven roof edges
- Loose metal components
Problems at the roof edge may also be connected to fascia or gutter damage.
This is another reason exterior restoration should be approached as a system.
Step 18: Check Shingles for Visible Storm Damage
You do not need to climb onto the roof to perform an initial visual inspection.
From the ground, look for obvious changes such as:
- Missing shingles
- Lifted shingles
- Broken shingles
- Damaged ridge caps
- Fallen debris
Some storm damage is not visible from ground level.
If the storm included hail, strong winds, or falling branches, professional inspection may reveal conditions that cannot be identified safely from the yard.
Step 19: Look for Wind Damage
Wind damage can occur without completely removing a shingle.
Strong winds may:
- Lift shingles
- Affect seals
- Create creases
- Damage ridge caps
- Loosen flashing
A roof may therefore look relatively normal from the ground even after significant wind.
If nearby properties experienced wind damage or you find roofing debris, consider having your roof inspected.
Step 20: Check Roof Valleys
Roof valleys collect runoff from multiple roof slopes.
Storm debris can accumulate in these areas.
Branches and leaves may interfere with water movement, while impacts can damage roofing materials.
Because valleys carry substantial amounts of runoff, problems should be addressed promptly.
Do not climb onto the roof to clear a valley if it cannot be safely reached.
Step 21: Inspect Flashing Areas
Flashing helps protect vulnerable roof intersections.
Common locations include:
- Chimneys
- Skylights
- Sidewalls
- Valleys
- Plumbing vents
Strong wind or falling debris may affect flashing.
Loose or damaged flashing can allow water beneath the roofing system.
Professional inspection is particularly useful because some flashing components are partially concealed.
Step 22: Inspect Roof Vents and Pipe Boots
Roof penetrations are common locations for leaks.
Storms may damage vents, caps, flashing, or surrounding roofing materials.
From the ground, look for obvious displacement.
Inside the attic, if safely accessible, check beneath roof penetration areas for new moisture.
These locations deserve a place on your storm damage exterior checklist because even a small opening can allow water into the roofing assembly.
Step 23: Look at Chimneys
If your home has a chimney, inspect it visually from the ground.
Look for:
- Loose flashing
- Visible masonry damage
- Missing caps
- Fallen pieces
- Debris around the roof
Do not attempt to inspect a damaged chimney from the roof.
Masonry or structural concerns may require evaluation by an appropriate professional.
Step 24: Check Skylights
Skylights should also be included in a post storm exterior inspection.
Look for obvious exterior damage and check the interior area around the skylight.
Warning signs include:
- New staining
- Moisture
- Dripping
- Damaged interior finishes
Moisture near a skylight can originate from flashing, roofing, the skylight assembly, or condensation, so proper diagnosis matters.
Step 25: Inspect Siding
A complete storm damage exterior checklist should include siding as well.
Wind and hail can affect siding differently depending on the material.
Look for:
- Cracks
- Dents
- Holes
- Loose panels
- Missing sections
- Warping
- Impact marks
Damaged siding can allow moisture to reach materials beneath the exterior surface.
Step 26: Look at Corners and Trim
Storm damage can affect trim pieces and exterior corners.
Wind may loosen materials, while hail or debris can create cracks and dents.
Check:
- Window trim
- Door trim
- Corner pieces
- Decorative exterior components
Loose materials should be secured or repaired before additional weather makes the problem worse.
Step 27: Check Windows and Screens
Inspect windows for:
- Broken glass
- Damaged screens
- Dented frames
- Cracked trim
- Water entry
Storm driven debris can damage windows even when the roofing system remains intact.
If glass is broken, keep people and pets away from the area until it can be safely addressed.
Step 28: Inspect Exterior Doors
Strong winds and flying debris can affect exterior doors and frames.
Check whether doors:
- Open normally
- Close securely
- Show impact damage
- Have damaged weatherstripping
- Show signs of water entry
Changes in operation following a severe storm may deserve further evaluation.
Step 29: Look for Fallen or Hanging Tree Limbs
Trees can create immediate and delayed hazards after storms.
A branch may have already struck the roof, while another damaged limb may still be hanging overhead.
Look for:
- Broken branches
- Split limbs
- Trees leaning toward the house
- Branches resting on roofing
Do not attempt to remove large or dangerous limbs yourself.
Qualified tree professionals should handle hazardous tree work, particularly near power lines.
Step 30: Inspect the Attic
Exterior storm damage can sometimes be identified from inside the attic.
If your attic is safely accessible, look for:
- Water stains
- Damp insulation
- Wet decking
- Dripping
- Daylight through unexpected openings
- Musty odors
Use caution around electrical systems and wet areas.
Interior evidence can help identify damage that is not obvious from outside.
Step 31: Check Ceilings and Walls
Walk through the interior of your home after significant rainfall.
Look for:
- New ceiling stains
- Wall discoloration
- Bubbling paint
- Damp drywall
- Musty odors
Do not assume that a small stain is harmless because it is not currently wet.
Some roof leaks occur only during particular wind directions or rainfall conditions.
Step 32: Check the Garage
Garages are sometimes overlooked during post storm inspections.
Look at:
- Garage ceilings
- Exposed roof decking
- Walls
- Stored belongings
Because unfinished garages may have exposed framing, water entry can sometimes be easier to spot there than inside finished rooms.
Step 33: Inspect Porches and Other Roofed Structures
Your storm damage exterior checklist should include all roofed areas attached to the home.
Inspect:
- Porches
- Patio roofs
- Carports
- Entry covers
- Bay window roofs
Smaller roofing sections can sustain damage even when the main roof appears unaffected.
Step 34: Examine Drainage Around the Foundation
Heavy rainfall may reveal drainage issues around the property.
Check whether water is pooling near the foundation.
Look for:
- Disconnected downspouts
- Washed out soil
- Erosion
- Standing water
- Damaged extensions
Gutters and downspouts should direct roof runoff appropriately away from vulnerable foundation areas.
Step 35: Photograph Storm Damage
Photographs create a useful record of property conditions.
Take clear images of visible damage when it is safe to do so.
Photograph:
- Gutters
- Downspouts
- Fascia
- Soffit
- Roofing debris
- Siding
- Interior stains
- Fallen branches
Include wider views showing the location and closer views showing visible details.
Keep photographs with other home maintenance records.
Step 36: Note When the Storm Occurred
Write down the approximate date and time of the storm.
Record what you observed, such as:
- Hail
- Strong wind
- Heavy rainfall
- Fallen branches
This information can help you remember the circumstances when speaking with contractors or reviewing property records later.
Step 37: Avoid Making Unsafe Temporary Repairs
Homeowners naturally want to stop water from entering their property.
However, climbing onto a wet or damaged roof can create serious fall risks.
If emergency protection is necessary, contact a roofing professional.
Temporary measures can be useful in certain situations, but they should not become permanent substitutes for proper repairs.
Step 38: Schedule a Professional Exterior Inspection
Some storm damage is difficult to identify from the ground.
A professional roofing and exterior inspection may evaluate:
- Shingles
- Flashing
- Roof penetrations
- Gutters
- Fascia
- Soffit
- Siding
- Roof edges
- Visible decking concerns
The purpose is to understand the extent of damage before deciding what needs repair or replacement.
Step 39: Determine Whether Gutters Need Repair or Replacement
Not every damaged gutter system needs complete replacement.
Repair may be appropriate when:
- Damage is localized
- Most sections remain securely attached
- Drainage remains functional
- Only limited hardware is affected
Replacement may deserve consideration when:
- Damage is widespread
- Multiple sections are crushed
- Gutters repeatedly pull away
- The system is significantly deteriorated
- Proper drainage cannot be restored through limited repairs
A professional evaluation can help determine the appropriate approach.
Step 40: Evaluate Fascia Before Reattaching Gutters
If a storm pulls gutters away from the home, do not assume they can simply be screwed back into place.
The fascia beneath the gutter should be evaluated.
If the supporting material has deteriorated, new fasteners may not hold properly.
Correcting damaged fascia before reinstalling gutters can help create a more secure restoration.
Step 41: Replace Damaged Soffit Sections
Loose or missing soffit can expose areas beneath roof overhangs.
Depending on the extent of damage, individual sections may be repairable or replaceable.
The contractor should also determine whether surrounding fascia, ventilation, or roof edge components were affected.
Restoring soffit correctly helps protect both appearance and function.
Step 42: Coordinate Roof and Exterior Repairs
Storm damage often affects more than one part of a home.
For example:
- Wind damages shingles.
- A branch bends a gutter.
- The gutter pulls on fascia.
- Soffit becomes displaced.
Treating these as unrelated problems may overlook how the damage occurred.
A coordinated restoration plan can help ensure that roofing, drainage, and exterior components work together after repairs.
Step 43: Understand Insurance Considerations
Homeowners insurance may provide coverage for certain types of sudden storm damage depending on the individual policy, circumstances, exclusions, deductibles, and insurer determination.
Homeowners should review their policy and contact their insurer when appropriate.
A roofing contractor can document visible property conditions and provide information about repair needs, but the insurance company determines coverage.
Be cautious of anyone who guarantees that a claim will be approved.
Step 44: Keep Repair Documentation
After restoration, keep copies of:
- Inspection photographs
- Estimates
- Invoices
- Material information
- Warranty documents
- Repair records
These records can be useful for future maintenance and help establish when work was completed.
Step 45: Inspect Again After the Next Heavy Rain
After repairs are completed, observe how the property performs during subsequent rainfall.
Check:
- Gutter flow
- Downspout discharge
- Roof edge drainage
- Interior ceilings
- Attic areas
Water should move through the drainage system without unusual overflow or leakage.
If a problem remains, contact the contractor for further evaluation.
Common Signs Storm Damage Needs Prompt Attention
Certain conditions should not be postponed.
These may include:
- Active water entry
- Missing shingles
- Large fallen branches
- Hanging gutters
- Missing soffit
- Severely damaged fascia
- Loose exterior materials
- Significant siding damage
Prompt attention can help limit additional exposure during the next weather event.
Why Gutters Are Part of Roof Restoration
Gutters are sometimes treated as separate from roofing, but they are directly connected to roof drainage.
A new or repaired roof still needs a functioning system to carry runoff away.
If gutters remain damaged after roof restoration, water may continue overflowing or collecting where it should not.
That is why our storm damage exterior checklist considers roofing and gutters together.
Why Soffit and Fascia Should Not Be Overlooked
Soffit and fascia help complete the roof edge.
Fascia supports important perimeter details and often gutter attachment.
Soffit protects the underside of overhangs and may contribute to attic ventilation.
Restoring shingles while ignoring damaged soffit or fascia can leave the exterior incomplete.
Homeowners should have all visibly affected components evaluated.
Preventing Future Storm Related Problems
No exterior system can prevent all storm damage.
However, routine maintenance can help reduce existing vulnerabilities before severe weather arrives.
Homeowners can:
- Keep gutters clean
- Maintain downspouts
- Address loose shingles
- Repair damaged fascia
- Secure loose soffit
- Trim hazardous branches
- Inspect after severe weather
- Address leaks promptly
Preventive maintenance helps ensure existing deterioration does not make storm damage worse.
Why Local Experience Matters
Homes throughout Columbia and nearby Illinois and Missouri communities face a variety of weather conditions.
Thunderstorms can bring heavy rain, wind, hail, and falling debris. Winter introduces snow, ice, and freezing temperatures. Seasonal temperature changes can also expose weaknesses in aging exterior materials.
A contractor familiar with local conditions can evaluate damage in the context of the weather your home experiences throughout the year.
For homeowners using a storm damage exterior checklist, local professional inspection can provide a closer evaluation of concerns identified from the ground.
Serving Illinois and Missouri Homeowners
Diamond Roofing & Exteriors serves Columbia, Waterloo, Alton, Bethalto, Godfrey, Chesterfield, Crystal City, Farmington, Festus, Herculaneum, Hillsboro, Mehlville, Oakville, Pevely, St. Charles, and St. Peters.
Whether your property experienced hail in Columbia, strong wind in Waterloo, heavy rain in Festus, or storm related exterior damage elsewhere in our service area, the same principle applies.
Inspect the complete exterior.
Do not stop after checking the shingles.
A thorough storm damage exterior checklist should include roofing, gutters, downspouts, fascia, soffit, siding, drainage, and interior warning signs.
Why Choose Diamond Roofing & Exteriors?
At Diamond Roofing & Exteriors, we understand that storm restoration can involve more than replacing damaged shingles.
Our services include roof inspections, roof repair, roof replacement, storm damage restoration, metal roofing, vinyl siding, gutters, and exterior solutions.
When storm damage affects several parts of the property, understanding how those systems connect can help create a more complete restoration plan.
A loose gutter may lead to fascia concerns.
Damaged soffit may expose areas beneath the roof overhang.
Missing shingles may indicate additional wind damage nearby.
Hail marks on gutters may provide a reason to inspect roofing materials more closely.
Our goal is to evaluate the visible condition of the exterior and recommend appropriate solutions based on what we find.
Complete Storm Damage Exterior Checklist
After severe weather, homeowners can use this condensed storm damage exterior checklist as a reference:
- Check the yard for shingles and roofing debris.
- Inspect gutters for dents, sagging, or separation.
- Check gutter seams and corners.
- Inspect downspouts for dents and disconnection.
- Confirm downspouts discharge appropriately.
- Look for excessive debris or granules in gutters.
- Check fascia for cracks, stains, and deterioration.
- Look for water behind gutters.
- Inspect soffit for loose or missing sections.
- Check soffit ventilation openings.
- Look for missing or lifted shingles.
- Inspect visible roof edges.
- Check for fallen branches.
- Look for visible flashing concerns.
- Inspect chimneys and skylights from the ground.
- Check siding for dents, cracks, and missing sections.
- Inspect windows, screens, and exterior doors.
- Check the attic for moisture when safely accessible.
- Look for ceiling and wall stains.
- Inspect garages, porches, and secondary roof areas.
- Check drainage around the foundation.
- Photograph visible damage.
- Keep notes about the storm.
- Avoid unsafe roof access.
- Schedule professional inspection when damage is suspected.
Following this process can help homeowners identify concerns that might otherwise remain unnoticed.
Final Thoughts
Storm damage does not always stop at the roof.
Wind, hail, heavy rain, and falling debris can affect gutters, soffit, fascia, siding, roof edges, drainage systems, and interior areas.
That is why a complete storm damage exterior checklist is so important after severe weather.
Begin with safety.
Stay away from downed power lines, unstable trees, and damaged structures. Avoid climbing onto the roof.
Then inspect the property systematically from the ground.
Start with roofing debris and visible roof changes. Move to gutters and downspouts. Check fascia and soffit. Examine siding, windows, doors, and exterior trim. Finally, inspect accessible interior and attic areas for moisture.
Document anything unusual.
Even a small change may provide useful information during a professional inspection.
Remember that not every dent or mark automatically means major restoration is necessary. Likewise, a roof that looks normal from the yard may still have damage that deserves closer evaluation after significant hail or wind.
The purpose of a storm damage exterior checklist is not to diagnose every problem yourself.
It is to help you recognize warning signs and know when professional evaluation may be appropriate.
For homeowners throughout Columbia, Waterloo, Alton, Bethalto, Godfrey, Chesterfield, Crystal City, Farmington, Festus, Herculaneum, Hillsboro, Mehlville, Oakville, Pevely, St. Charles, and St. Peters, timely inspection can help prevent damaged exterior components from remaining exposed through the next storm.
If your home has recently experienced hail, strong winds, heavy rain, or falling debris, use this storm damage exterior checklist to complete a safe initial assessment, then contact Diamond Roofing & Exteriors for professional inspection and appropriate restoration recommendations.
